Following my last post on what you should be aware of when renovating a bathroom, our learning curve got even steeper. So this is another post to detail what we have learnt after that. The bathrooms were coming together pretty well, the toilet bowls are in and all 3 flush down violently, just the way we like it. A minor hiccup with the sinks though. We bought two full pedestal sinks for the 2nd and 3rd bathrooms because I don’t like the sight of bottle traps.
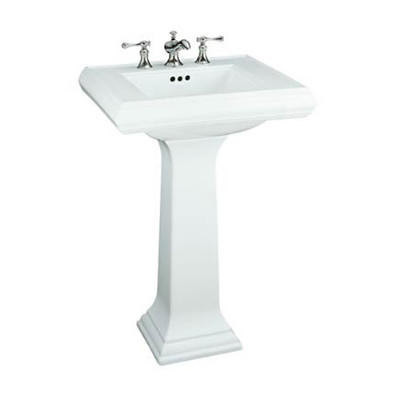
# – This is a full pedestal sink.

# – This is a sink with no pedestal and hence the bottle trap is visible.

However, as our contractor was about to install them, he realised that in one of the bathrooms, the floor trap was located right beneath where the sink should be and therefore if we insisted on putting in the pedestal, it would obstruct the floor traps. As illustrated below:
# – This is the situation we were facing. Major nono to have the floor trap obstructed.

This is absolutely unacceptable, so in the end we decided to do away with all the pedestals and just use pretty looking bottle traps (so I won’t have one bathroom with pedestal sink and another with none).
That said, it’s still not my most ideal situation as I don’t like seeing bottle traps whether pretty or not, but it’s just something I have to deal with because it cost too much to relocate the floor traps. So if you’re installing sinks, make sure your floor traps are located in the appropriate areas of your bathrooms.
So that little issue out of the picture and we thought everything was fine and dandy again. Till we walked into our bathrooms one day and we were greeted with the sight of this monstrosity:
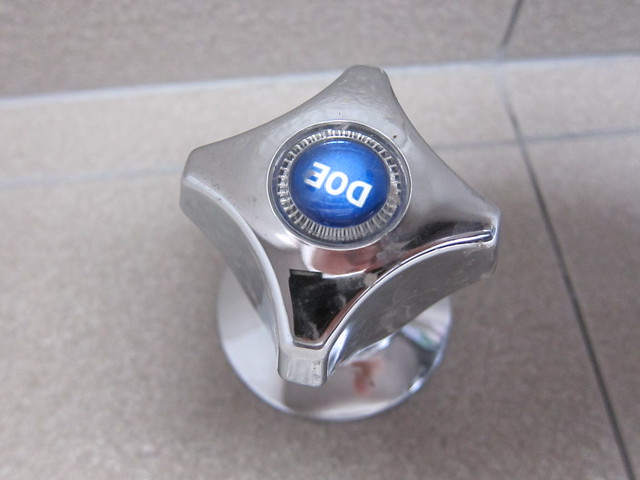
# – This was OUR stopcock.

The stopcock is a valve that regulates the flow of water in the pipes. You’re probably familiar with its sight, those faucets that stick out of your walls with no apparent use (till you have a leak or something one day, of course).
Like the floor traps, make sure they are positioned in the appropriate areas if you could help it, not near where you might want to put in a cabinet or mirror etc. This was something that we didn’t think of, so now our stopcocks are very visible in the bathrooms. If I had known earlier during the renovation, I would have requested that they be relocated to areas more hidden from view (such as below the sink or a corner).
Anyway, back to the monstrosities. We were shocked by its sheer ugliness. It was big, shiny and made of plastic. All six of them.
I didn’t know how much trouble we were in until I consulted my contractor, whose face promptly turned a darker shade of pale after I had expressed that I could not accept the aesthetics of the stopcock faucets and they must be removed.
As it turned out, stopcock faucets are all different in built from brand to brand. Changing one, even if it’s just the exterior would mean hacking into the walls, cutting the pipes and replacing it. Can you imagine replacing all six of them? I can totally relate to his anxiety.
Anyway, we decided to take a sample of our current stopcock faucets to our regular kitchen & bath shop. According to the salesperson, there is a chance that the exterior of one brand might fit another and we may not have to resort to hacking the walls. With our fingers crossed, she cross checked multiple brands with our existing one, and finally, she FOUND A BRAND THAT FIT! And the best thing of all, it’s the exact design that we were hoping for.
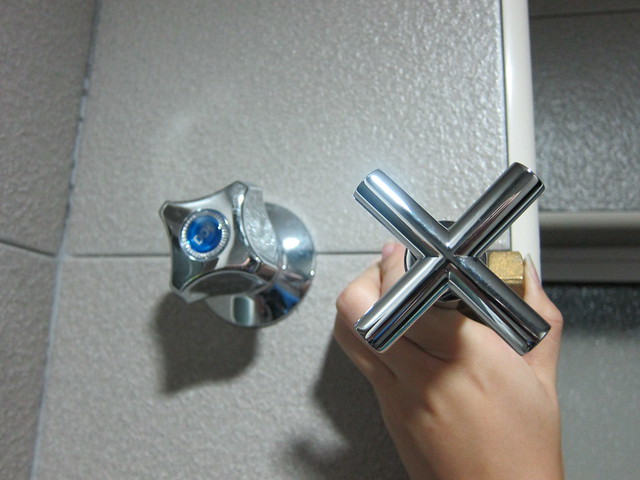
# – Monstrosity on the left and the new stopcock on the right.

So yeah, we are pretty lucky in that sense. No hacking, no cutting pipes, just unscrewing the exterior and screwing the new ones in. So if you’re ever re-doing your bathrooms, please, please, please remind your contractor that you want a specific design for your stopcock faucets (unless you don’t give a damn, of course).
Seriously hoping I won’t need to write a 3rd post on bathroom! /cross fingers.
Happy renovating :)